Redux 基础教程,第 7 部分:标准 Redux 模式
本页面由 PageTurner AI 翻译(测试版)。未经项目官方认可。 发现错误? 报告问题 →
- 真实世界 Redux 应用中的标准模式及其存在原因:
- 使用动作创建器封装动作对象
- 使用记忆化选择器提升性能
- 通过加载枚举跟踪请求状态
- 规范化状态以管理项目集合
- 处理 Promise 和 thunk
- 理解之前所有章节的内容
在第 6 部分:异步逻辑与数据获取中,我们学习了如何使用 Redux 中间件编写能与 store 交互的异步逻辑。特别地,我们使用了 Redux "thunk" 中间件来编写包含可复用异步逻辑的函数,这些函数无需预先知道它们将与哪个 Redux store 交互。
到目前为止,我们已经介绍了 Redux 的基本工作原理。然而,真实世界的 Redux 应用会在这些基础之上使用一些额外模式。
需要重点注意的是:这些模式都不是使用 Redux 所必需的! 但它们的存在都有充分理由,你几乎会在每个 Redux 代码库中看到部分或全部这些模式。
在本节中,我们将重构现有的待办事项应用代码以使用其中一些模式,并讨论它们为何在 Redux 应用中被广泛采用。接着在第 8 部分,我们将探讨"现代 Redux",包括如何使用官方 Redux Toolkit 来简化应用中手动编写的 Redux 逻辑,以及为何我们推荐将 Redux Toolkit 作为编写 Redux 应用的标准方法。
本页面由 PageTurner AI 翻译(测试版)。未经项目官方认可。 发现错误? 报告问题 →
请注意,本教程有意展示旧式的 Redux 逻辑模式(这些模式比我们当前推荐的 "现代 Redux" 模式需要编写更多代码),目的是为了解释 Redux 背后的原理和概念。它_并非_用于生产环境的项目。
学习使用 Redux Toolkit 实现 "现代 Redux" 模式,请参考以下文档:
- 完整的 "Redux 必备教程":使用 Redux Toolkit 教授"如何以正确方式使用 Redux"构建真实应用。我们推荐所有 Redux 学习者阅读此教程!
- Redux 基础教程,第 8 部分:使用 Redux Toolkit 的现代 Redux:展示如何将前面章节的底层示例转换为现代 Redux Toolkit 实现
动作创建器
在我们的应用中,我们一直在代码中直接编写动作对象并在调度位置使用:
dispatch({ type: 'todos/todoAdded', payload: trimmedText })
但实际上,设计良好的 Redux 应用不会在调度时直接内联编写这些动作对象。相反,我们会使用"动作创建器"函数。
动作创建器是创建并返回动作对象的函数。通常用于避免手动编写动作对象:
const todoAdded = text => {
  return {
    type: 'todos/todoAdded',
    payload: text
  }
}
我们通过调用动作创建器,然后将生成的动作对象直接传递给 dispatch 来使用它们:
store.dispatch(todoAdded('Buy milk'))

console.log(store.getState().todos)
// [ {id: 0, text: 'Buy milk', completed: false}]
Detailed Explanation: Why use Action Creators?
In our small example todo app, writing action objects by hand every time isn't too difficult. In fact, by switching to using action creators, we've added more work - now we have to write a function and the action object.
But, what if we needed to dispatch the same action from many parts of the application? Or what if there's some additional logic that we have to do every time we dispatch an action, like creating a unique ID? We'd end up having to copy-paste the additional setup logic every time we need to dispatch that action.
Action creators have two primary purposes:
- They prepare and format the contents of action objects
- They encapsulate any additional work needed whenever we create those actions
That way, we have a consistent approach for creating actions, whether or not there's any extra work that needs to be done. The same goes for thunks as well.
使用动作创建器
让我们更新待办事项的 slice 文件,为几个动作类型使用动作创建器。
我们将从目前使用的两个主要动作开始:从服务器加载待办事项列表,以及在保存到服务器后添加新待办事项。
当前 todosSlice.js 直接调度动作对象,如下所示:
dispatch({ type: 'todos/todosLoaded', payload: response.todos })
我们将创建一个函数,它接收待办事项数组作为参数,将其放入 action.payload 中,然后返回相同类型的动作对象。接着就可以在 fetchTodos thunk 中使用这个新的动作创建器来调度动作:
export const todosLoaded = todos => {
  return {
    type: 'todos/todosLoaded',
    payload: todos
  }
}

export async function fetchTodos(dispatch, getState) {
  const response = await client.get('/fakeApi/todos')
  dispatch(todosLoaded(response.todos))
}
我们也可以对"待办事项已添加"动作进行同样的处理:
export const todoAdded = todo => {
  return {
    type: 'todos/todoAdded',
    payload: todo
  }
}

export function saveNewTodo(text) {
  return async function saveNewTodoThunk(dispatch, getState) {
    const initialTodo = { text }
    const response = await client.post('/fakeApi/todos', { todo: initialTodo })
    dispatch(todoAdded(response.todo))
  }
}
趁此机会,让我们对"颜色筛选器已变更"动作也做同样的改造:
export const colorFilterChanged = (color, changeType) => {
  return {
    type: 'filters/colorFilterChanged',
    payload: { color, changeType }
  }
}
由于这个动作原本是从 <Footer> 组件调度的,我们需要将 colorFilterChanged 动作创建器导入该组件并使用:
import React from 'react'
import { useSelector, useDispatch } from 'react-redux'

import { availableColors, capitalize } from '../filters/colors'
import { StatusFilters, colorFilterChanged } from '../filters/filtersSlice'

// omit child components

const Footer = () => {
  const dispatch = useDispatch()

  const todosRemaining = useSelector(state => {
    const uncompletedTodos = state.todos.filter(todo => !todo.completed)
    return uncompletedTodos.length
  })

  const { status, colors } = useSelector(state => state.filters)

  const onMarkCompletedClicked = () => dispatch({ type: 'todos/allCompleted' })
  const onClearCompletedClicked = () =>
    dispatch({ type: 'todos/completedCleared' })

  const onColorChange = (color, changeType) =>
    dispatch(colorFilterChanged(color, changeType))

  const onStatusChange = status =>
    dispatch({ type: 'filters/statusFilterChanged', payload: status })

  // omit rendering output
}

export default Footer
注意 colorFilterChanged 动作创建器实际上接受两个不同的参数,然后将它们组合成正确的 action.payload 字段。
这不会改变应用程序的工作方式或 Redux 数据流的行为——我们仍然在创建动作对象并调度它们。但不同于以往总是在代码中直接编写动作对象,我们现在使用动作创建器在调度前准备这些动作对象。
我们也可以将动作创建器与 thunk 函数结合使用,事实上我们在上一节中已经将 thunk 包装在动作创建器里。我们特意将 saveNewTodo 包装在 "thunk 动作创建器" 函数中以便传入 text 参数。虽然 fetchTodos 不需要任何参数,但我们同样可以将其包装在动作创建器中:
export function fetchTodos() {
  return async function fetchTodosThunk(dispatch, getState) {
    const response = await client.get('/fakeApi/todos')
    dispatch(todosLoaded(response.todos))
  }
}
这意味着我们需要在 index.js 中修改其派发的位置:改为调用外层的 thunk 动作创建器函数,并将返回的内部 thunk 函数传递给 dispatch:
import store from './store'
import { fetchTodos } from './features/todos/todosSlice'

store.dispatch(fetchTodos())
目前我们一直使用 function 关键字编写 thunk 以明确其行为,但也可以改用箭头函数语法。使用隐式返回可以缩短代码,不过如果你不熟悉箭头函数可能会降低可读性:
// Same thing as the above example!
export const fetchTodos = () => async dispatch => {
  const response = await client.get('/fakeApi/todos')
  dispatch(todosLoaded(response.todos))
}
同样地,如果需要我们_也可以_简化普通的动作创建器:
export const todoAdded = todo => ({ type: 'todos/todoAdded', payload: todo })
是否以这种方式使用箭头函数更好,由您决定。
关于动作创建器为何有用的更多详情,请参阅:
记忆化选择器
我们已经知道可以编写 "选择器" 函数,它接受 Redux state 对象作为参数并返回一个值:
const selectTodos = state => state.todos
如果我们需要_派生_一些数据怎么办?例如,也许我们只想要一个包含待办事项ID的数组:
const selectTodoIds = state => state.todos.map(todo => todo.id)
然而,array.map() 总是返回一个新的数组引用。我们知道 React-Redux 的 useSelector hook 在_每次_派发 action 后都会重新运行其 selector 函数,并且如果 selector 的结果发生变化,它将强制组件重新渲染。
在这个例子中,调用 useSelector(selectTodoIds) 将会在_每次_动作之后_总是_导致组件重新渲染,因为它返回了一个新的数组引用!
在第 5 部分中,我们看到可以将 shallowEqual 作为参数传递给 useSelector。不过,这里还有另一种选择:我们可以使用"记忆化"(memoized)选择器。
记忆化是一种缓存技术——具体来说,就是保存一个昂贵计算的结果,并在之后遇到相同输入时重用这些结果。
记忆化是一种缓存机制——保存昂贵计算的结果,并在后续遇到相同输入时复用这些结果。
使用 createSelector 记忆化选择器
Reselect 库 提供 createSelector API 来生成记忆化选择器函数。createSelector 接受一个或多个"输入选择器"函数,外加一个"输出选择器",返回新的选择器函数。每次调用时:
-
所有"输入选择器"都会使用全部参数被调用
-
如果任何输入选择器的返回值变化,"输出选择器"将重新运行
-
所有输入选择器的结果都会成为输出选择器的参数
-
输出选择器的最终结果会被缓存供下次使用
让我们创建 selectTodoIds 的记忆化版本并在 <TodoList> 中使用:
首先需要安装 Reselect:
npm install reselect
接着,我们可以导入并调用 createSelector。原始的 selectTodoIds 函数定义在 TodoList.js 中,但通常选择器函数应写在相关的切片文件中。因此,让我们在 todos 切片中添加以下内容:
import { createSelector } from 'reselect'

// omit reducer

// omit action creators

export const selectTodoIds = createSelector(
  // First, pass one or more "input selector" functions:
  state => state.todos,
  // Then, an "output selector" that receives all the input results as arguments
  // and returns a final result value
  todos => todos.map(todo => todo.id)
)
然后在 <TodoList> 中使用它:
import React from 'react'
import { useSelector, shallowEqual } from 'react-redux'

import { selectTodoIds } from './todosSlice'
import TodoListItem from './TodoListItem'

const TodoList = () => {
  const todoIds = useSelector(selectTodoIds)

  const renderedListItems = todoIds.map(todoId => {
    return <TodoListItem key={todoId} id={todoId} />
  })

  return <ul className="todo-list">{renderedListItems}</ul>
}
这种行为实际上与 shallowEqual 比较函数有所不同。每当 state.todos 数组发生变化时,我们都会生成新的待办事项 ID 数组。这包括对待办事项的任何不可变更新(例如切换 completed 字段),因为不可变更新需要创建新数组。
记忆化选择器仅在需要从原始数据派生额外值时才有帮助。如果只是查找并返回现有值,可以保持选择器为普通函数。
多参数选择器
我们的待办事项应用需要能够根据完成状态筛选可见的待办事项。让我们编写一个返回筛选后待办事项列表的记忆化选择器。
我们知道输出选择器需要整个 todos 数组作为参数,同时还需要传入当前的完成状态筛选值。我们将添加单独的"输入选择器"来提取每个值,并将结果传递给"输出选择器"。
import { createSelector } from 'reselect'
import { StatusFilters } from '../filters/filtersSlice'

// omit other code

export const selectFilteredTodos = createSelector(
  // First input selector: all todos
  state => state.todos,
  // Second input selector: current status filter
  state => state.filters.status,
  // Output selector: receives both values
  (todos, status) => {
    if (status === StatusFilters.All) {
      return todos
    }

    const completedStatus = status === StatusFilters.Completed
    // Return either active or completed todos based on filter
    return todos.filter(todo => todo.completed === completedStatus)
  }
)
注意,我们现在在两个切片之间建立了导入依赖关系 - todosSlice 正在从 filtersSlice 导入值。这是允许的,但需要小心。如果两个切片_都_尝试相互导入内容,可能会导致"循环导入依赖"问题,进而引发代码崩溃。如果发生这种情况,请尝试将公共代码移至单独文件并从该文件导入。
现在我们可以将这个新的"筛选后待办事项"选择器作为另一个选择器的输入,该选择器返回这些待办事项的 ID:
export const selectFilteredTodoIds = createSelector(
  // Pass our other memoized selector as an input
  selectFilteredTodos,
  // And derive data in the output selector
  filteredTodos => filteredTodos.map(todo => todo.id)
)
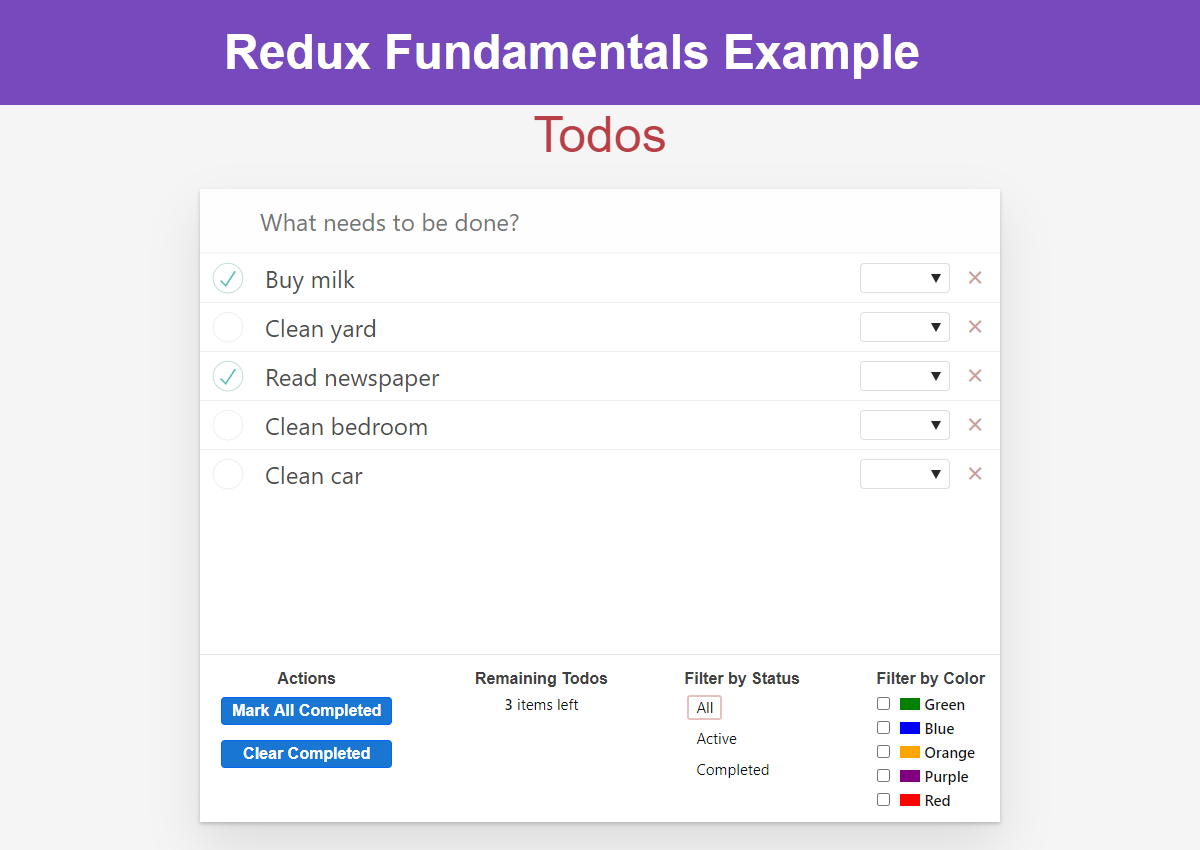
如果让 <TodoList> 改用 selectFilteredTodoIds,我们应该能够将几个待办事项标记为已完成:
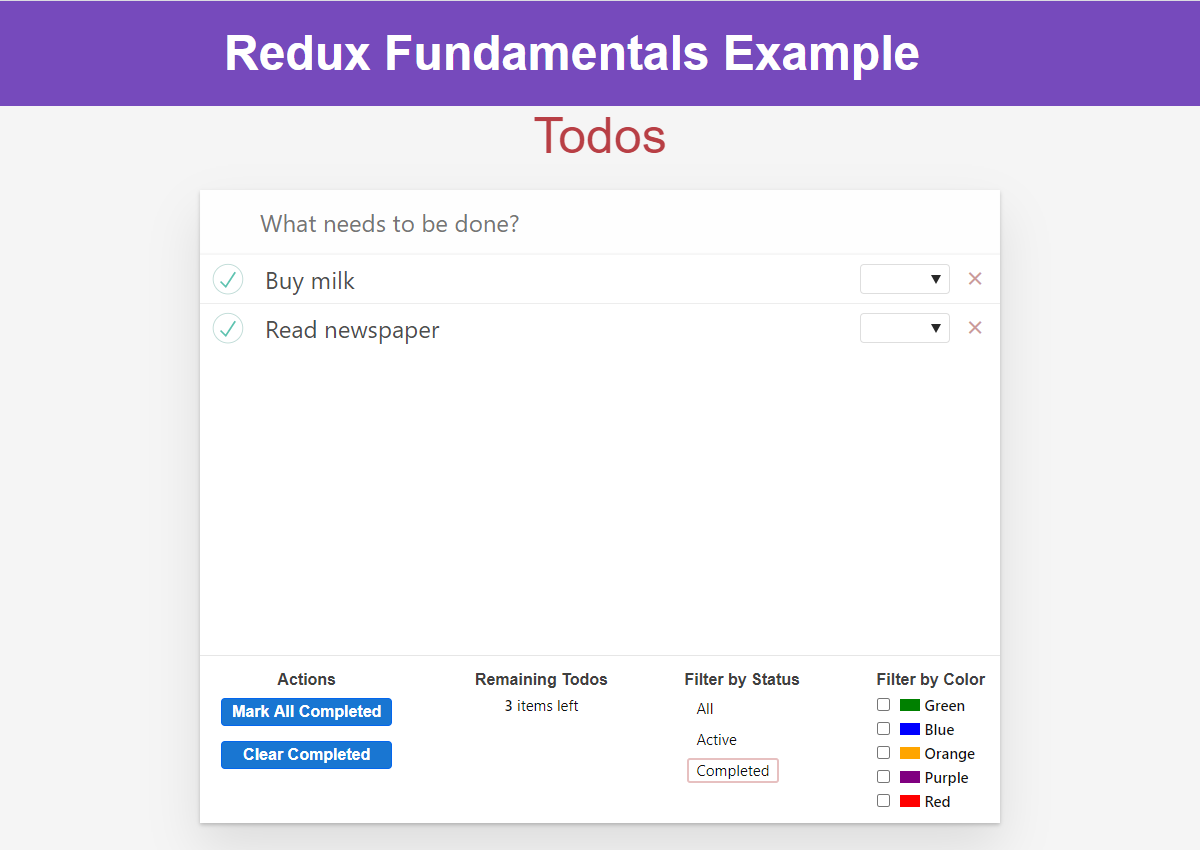
然后筛选列表_仅_显示已完成的待办事项:
我们可以扩展 selectFilteredTodos 选择器,使其在选择中也包含颜色筛选:
export const selectFilteredTodos = createSelector(
  // First input selector: all todos
  selectTodos,
  // Second input selector: all filter values
  state => state.filters,
  // Output selector: receives both values
  (todos, filters) => {
    const { status, colors } = filters
    const showAllCompletions = status === StatusFilters.All
    if (showAllCompletions && colors.length === 0) {
      return todos
    }

    const completedStatus = status === StatusFilters.Completed
    // Return either active or completed todos based on filter
    return todos.filter(todo => {
      const statusMatches =
        showAllCompletions || todo.completed === completedStatus
      const colorMatches = colors.length === 0 || colors.includes(todo.color)
      return statusMatches && colorMatches
    })
  }
)
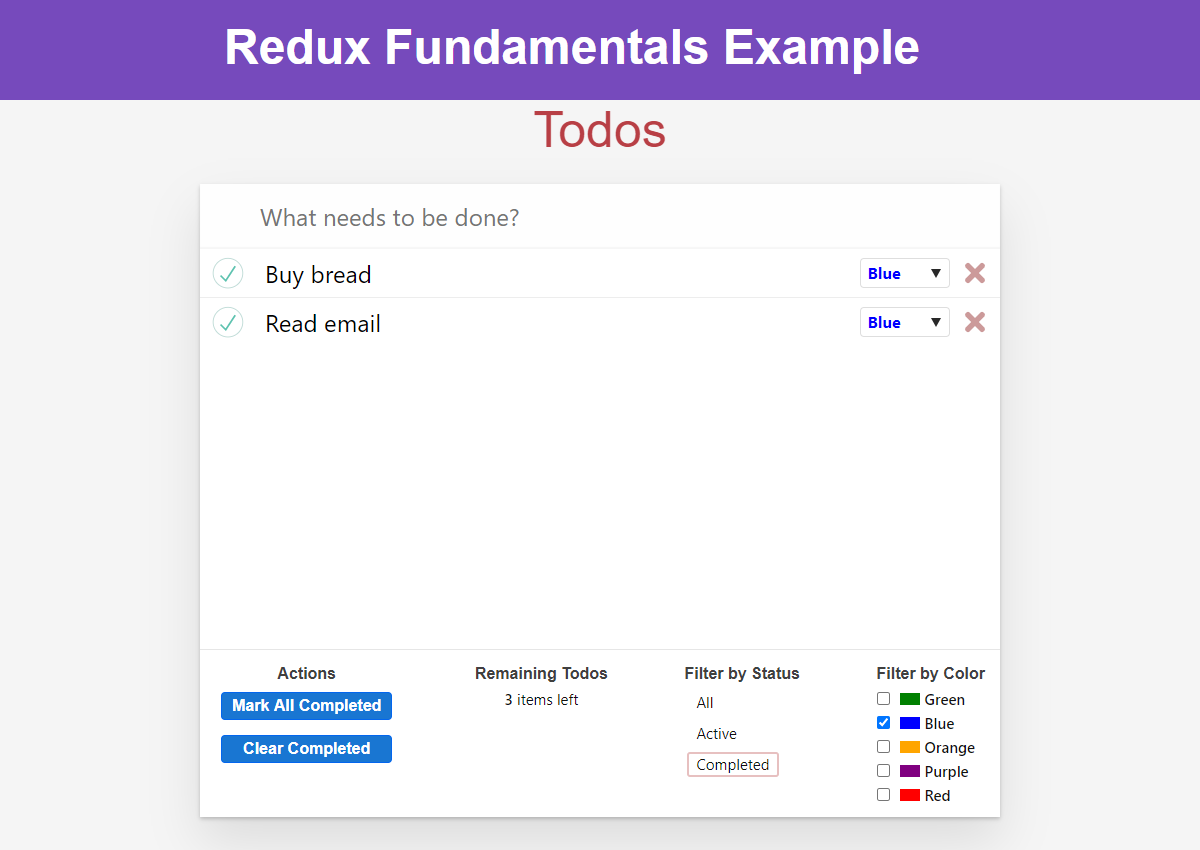
注意,通过将逻辑封装在此选择器中,即使我们更改了筛选行为,组件也无需修改。现在我们可以同时按状态和颜色进行筛选:
最后,我们的代码中有多处引用了 state.todos。在接下来的内容中,我们将对此状态的设计进行一些更改,因此我们将提取一个单独的 selectTodos 选择器并在各处使用它。同时将 selectTodoById 移至 todosSlice:
export const selectTodos = state => state.todos

export const selectTodoById = (state, todoId) => {
  return selectTodos(state).find(todo => todo.id === todoId)
}
关于为何使用选择器函数以及如何使用 Reselect 编写记忆化选择器的更多详情,请参阅:
异步请求状态
我们使用异步 thunk 从服务器获取初始待办事项列表。由于使用的是模拟服务器 API,响应会立即返回。在实际应用中,API 调用可能需要较长时间才能解析。这种情况下,通常会在等待响应完成时显示加载指示器。
在 Redux 应用中通常通过以下方式处理:
-
使用某种"加载状态"值来指示请求的当前状态
-
在发起 API 调用_前_分发"请求开始"动作,该动作会更改加载状态值
-
请求完成后再次更新加载状态值以指示调用结束
UI 层会在请求进行时显示加载动画,并在请求完成后切换为展示实际数据。
我们将更新待办事项切片以跟踪加载状态值,并在 fetchTodos thunk 中额外派发 'todos/todosLoading' 动作。
当前待办事项 reducer 的 state 仅是待办事项数组。若要在切片内部跟踪加载状态,需将状态重组为包含待办事项数组 和 加载状态值的对象。这也意味着需要重写 reducer 逻辑以处理额外的嵌套结构:
const initialState = {
  status: 'idle',
  entities: []
}

export default function todosReducer(state = initialState, action) {
  switch (action.type) {
    case 'todos/todoAdded': {
      return {
        ...state,
        entities: [...state.entities, action.payload]
      }
    }
    case 'todos/todoToggled': {
      return {
        ...state,
        entities: state.entities.map(todo => {
          if (todo.id !== action.payload) {
            return todo
          }

          return {
            ...todo,
            completed: !todo.completed
          }
        })
      }
    }
    // omit other cases
    default:
      return state
  }
}

// omit action creators

export const selectTodos = state => state.todos.entities
此处有几点重要注意事项:
-
待办事项数组现在嵌套在
todosReducer状态对象的state.entities中。"entities" 表示 "具有 ID 的唯一项",正符合待办事项对象的特性 -
这也意味着数组在 整个 Redux 状态对象中嵌套为
state.todos.entities -
现在 reducer 中需要额外步骤来正确复制嵌套层级以实现不可变更新,例如
state对象 ->entities数组 ->todo对象 -
由于其余代码 仅 通过选择器访问待办事项状态,只需更新
selectTodos选择器 - 即使我们大幅重构了状态结构,其余 UI 仍能正常工作
加载状态枚举值
您还会注意到加载状态字段定义为字符串枚举:
{
  status: 'idle' // or: 'loading', 'succeeded', 'failed'
}
而非 isLoading 布尔值
布尔值仅限 "加载中" 或 "未加载" 两种状态。实际场景中请求可能处于 多种 不同状态,例如:
-
尚未开始
-
进行中
-
成功
-
失败
-
成功但需要重新获取
应用逻辑可能仅允许在特定动作间转换状态,使用布尔值难以实现此约束
因此我们推荐使用字符串枚举值而非布尔标记存储加载状态
关于为何使用枚举表示加载状态的详细解释,请参阅:
基于此,我们将添加新的 "loading" 动作将状态设为 'loading',并更新 "loaded" 动作将状态重置为 'idle':
const initialState = {
  status: 'idle',
  entities: []
}

export default function todosReducer(state = initialState, action) {
  switch (action.type) {
    // omit other cases
    case 'todos/todosLoading': {
      return {
        ...state,
        status: 'loading'
      }
    }
    case 'todos/todosLoaded': {
      return {
        ...state,
        status: 'idle',
        entities: action.payload
      }
    }
    default:
      return state
  }
}

// omit action creators

// Thunk function
export const fetchTodos = () => async dispatch => {
  dispatch(todosLoading())
  const response = await client.get('/fakeApi/todos')
  dispatch(todosLoaded(response.todos))
}
在 UI 中展示前,需修改模拟服务器 API 为调用添加人工延迟。打开 src/api/server.js 并定位到约 63 行的注释行:
new Server({
  routes() {
    this.namespace = 'fakeApi'
    // this.timing = 2000

    // omit other code
  }
})
取消注释后,模拟服务器将为每次 API 调用添加 2 秒延迟,确保有足够时间显示加载动画
现在可在 <TodoList> 组件中读取加载状态值,并根据该值显示加载动画
// omit imports

const TodoList = () => {
  const todoIds = useSelector(selectFilteredTodoIds)
  const loadingStatus = useSelector(state => state.todos.status)

  if (loadingStatus === 'loading') {
    return (
      <div className="todo-list">
        <div className="loader" />
      </div>
    )
  }

  const renderedListItems = todoIds.map(todoId => {
    return <TodoListItem key={todoId} id={todoId} />
  })

  return <ul className="todo-list">{renderedListItems}</ul>
}
实际应用中还需处理 API 失败错误等潜在情况
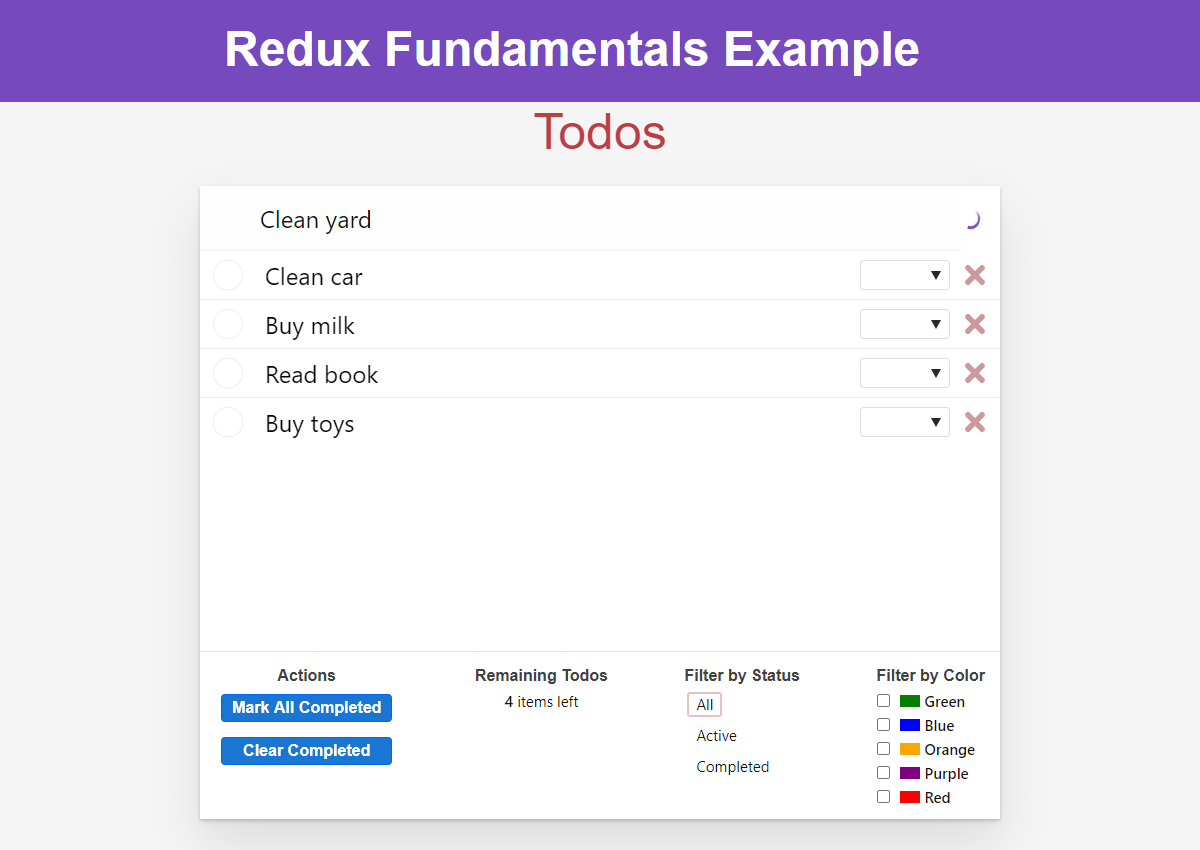
启用加载状态后的应用效果如下(重新加载预览或在新建标签页打开可再次查看加载动画):
Flux 标准动作
Redux store 本身并不关心你在动作对象中放入哪些字段。它只要求 action.type 存在且为字符串类型。这意味着你可以自由添加任意字段到动作中。例如,对于“添加待办事项”的动作,我们可以使用 action.todo 字段,或通过 action.color 传递颜色值等。
然而,如果每个动作都为其数据字段使用不同的字段名,将难以预知每个 reducer 需要处理哪些字段。
为此,Redux 社区提出了 Flux 标准动作规范(FSA)。这是组织动作对象字段的建议方案,让开发者能清晰预判各字段包含的数据类型。FSA 模式在 Redux 社区被广泛采用,事实上本教程全程都在使用这一模式。
FSA 规范约定:
-
若动作对象包含实际数据,该"数据"值必须置于
action.payload中 -
动作可包含
action.meta字段存放额外描述性数据 -
动作可包含
action.error字段存放错误信息
因此,所有 Redux 动作必须:
-
是纯 JavaScript 对象
-
包含
type字段
若采用 FSA 模式编写动作,则动作可包含:
-
payload字段 -
error字段 -
meta字段
Detailed Explanation: FSAs and Errors
The FSA specification says that:
The optional
errorproperty MAY be set totrueif the action represents an error. An action whoseerroris true is analogous to a rejected Promise. By convention, thepayloadSHOULD be an error object. Iferrorhas any other value besidestrue, includingundefinedandnull, the action MUST NOT be interpreted as an error.
The FSA specs also argue against having specific action types for things like "loading succeeded" and "loading failed".
However, in practice, the Redux community has ignored the idea of using action.error as a boolean flag, and instead settled on separate action types, like 'todos/todosLoadingSucceeded' and 'todos/todosLoadingFailed'. This is because it's much easier to check for those action types than it is to first handle 'todos/todosLoaded' and then check if (action.error).
You can do whichever approach works better for you, but most apps use separate action types for success and failure.
规范化状态
目前,我们将待办事项存储在数组中。这是合理的处理方式,因为从服务器获取的数据本就是数组格式,且在 UI 中需要遍历数组来展示待办事项列表。
但在大型 Redux 应用中,通常会将数据存储在规范化状态结构中。"规范化"意味着:
-
确保每条数据仅存唯一副本
-
通过 ID 直接定位数据项
-
通过 ID 引用其他数据项,而非复制整个对象
以博客应用为例:Post 对象可能关联 User 和 Comment 对象。同一用户可能发布多篇文章,若每篇 Post 都包含完整的 User 对象,会导致同一个 User 对象的多份副本。规范化的做法是让 Post 对象通过 post.user 存储用户 ID,然后通过 state.users[post.user] 查找相应的 User 对象。
这意味着我们通常将数据组织为对象而非数组,其中数据项 ID 作为键名,数据项本身作为键值:
const rootState = {
  todos: {
    status: 'idle',
    entities: {
      2: { id: 2, text: 'Buy milk', completed: false },
      7: { id: 7, text: 'Clean room', completed: true }
    }
  }
}
现在我们将待办事项切片转换为规范化存储格式。这需要对 reducer 逻辑进行重大调整,并更新相关选择器:
const initialState = {
  status: 'idle',
  entities: {}
}

export default function todosReducer(state = initialState, action) {
  switch (action.type) {
    case 'todos/todoAdded': {
      const todo = action.payload
      return {
        ...state,
        entities: {
          ...state.entities,
          [todo.id]: todo
        }
      }
    }
    case 'todos/todoToggled': {
      const todoId = action.payload
      const todo = state.entities[todoId]
      return {
        ...state,
        entities: {
          ...state.entities,
          [todoId]: {
            ...todo,
            completed: !todo.completed
          }
        }
      }
    }
    case 'todos/colorSelected': {
      const { color, todoId } = action.payload
      const todo = state.entities[todoId]
      return {
        ...state,
        entities: {
          ...state.entities,
          [todoId]: {
            ...todo,
            color
          }
        }
      }
    }
    case 'todos/todoDeleted': {
      const newEntities = { ...state.entities }
      delete newEntities[action.payload]
      return {
        ...state,
        entities: newEntities
      }
    }
    case 'todos/allCompleted': {
      const newEntities = { ...state.entities }
      Object.values(newEntities).forEach(todo => {
        newEntities[todo.id] = {
          ...todo,
          completed: true
        }
      })
      return {
        ...state,
        entities: newEntities
      }
    }
    case 'todos/completedCleared': {
      const newEntities = { ...state.entities }
      Object.values(newEntities).forEach(todo => {
        if (todo.completed) {
          delete newEntities[todo.id]
        }
      })
      return {
        ...state,
        entities: newEntities
      }
    }
    case 'todos/todosLoading': {
      return {
        ...state,
        status: 'loading'
      }
    }
    case 'todos/todosLoaded': {
      const newEntities = {}
      action.payload.forEach(todo => {
        newEntities[todo.id] = todo
      })
      return {
        ...state,
        status: 'idle',
        entities: newEntities
      }
    }
    default:
      return state
  }
}

// omit action creators

const selectTodoEntities = state => state.todos.entities

export const selectTodos = createSelector(selectTodoEntities, entities =>
  Object.values(entities)
)

export const selectTodoById = (state, todoId) => {
  return selectTodoEntities(state)[todoId]
}
由于 state.entities 字段从数组变为对象,更新数据时需使用嵌套对象展开运算符替代数组操作。此外,由于无法像遍历数组那样直接遍历对象,在多处需通过 Object.values(entities) 获取待办事项数组以便遍历。
好消息是:由于使用选择器封装状态查询,UI 部分无需任何改动。坏消息是:reducer 代码实际上变得更长更复杂。
部分原因在于当前待办事项应用并非大型实际项目。因此规范化状态在此场景优势不明显,其潜在价值较难直观体现。
幸运的是,在第 8 部分:使用 Redux Toolkit 的现代 Redux中,我们将看到大幅简化管理规范化状态的 reducer 逻辑的方法。
目前需要理解的重点包括:
-
规范化在 Redux 应用中被广泛使用
-
主要优势在于能够通过 ID 查找单个条目,并确保状态中只存在条目的单一副本
关于规范化在 Redux 中实用性的更多详情,请参阅:
Thunk 与 Promise
本节还有最后一个模式需要探讨。我们已经了解了如何基于分发的 action 处理 Redux store 中的加载状态。如果我们需要在组件中查看 thunk 的执行结果该怎么办?
当调用 store.dispatch(action) 时,dispatch 方法实际会返回该 action 作为结果。中间件可以修改此行为并返回其他值。
Redux Thunk 中间件允许我们向 dispatch 传递函数,执行该函数后返回结果:
const reduxThunkMiddleware = storeAPI => next => action => {
  // If the "action" is actually a function instead...
  if (typeof action === 'function') {
    // then call the function and pass `dispatch` and `getState` as arguments
    // Also, return whatever the thunk function returns
    return action(storeAPI.dispatch, storeAPI.getState)
  }

  // Otherwise, it's a normal action - send it onwards
  return next(action)
}
这意味着我们可以编写返回 promise 的 thunk 函数,并在组件中等待该 promise 完成。
当前 <Header> 组件已通过 thunk 将新待办事项保存到服务器。让我们在 <Header> 组件内添加加载状态:在等待服务器响应时禁用文本输入框并显示加载指示器:
const Header = () => {
  const [text, setText] = useState('')
  const [status, setStatus] = useState('idle')
  const dispatch = useDispatch()

  const handleChange = e => setText(e.target.value)

  const handleKeyDown = async e => {
    // If the user pressed the Enter key:
    const trimmedText = text.trim()
    if (e.which === 13 && trimmedText) {
      // Create and dispatch the thunk function itself
      setStatus('loading')
      // Wait for the promise returned by saveNewTodo
      await dispatch(saveNewTodo(trimmedText))
      // And clear out the text input
      setText('')
      setStatus('idle')
    }
  }

  let isLoading = status === 'loading'
  let placeholder = isLoading ? '' : 'What needs to be done?'
  let loader = isLoading ? <div className="loader" /> : null

  return (
    <header className="header">
      <input
        className="new-todo"
        placeholder={placeholder}
        autoFocus={true}
        value={text}
        onChange={handleChange}
        onKeyDown={handleKeyDown}
        disabled={isLoading}
      />
      {loader}
    </header>
  )
}

export default Header
现在添加待办事项时,将在顶部看到加载指示器:
学习要点
如你所见,Redux 应用中广泛使用着多种附加模式。这些模式并非强制要求,初期可能增加代码量,但它们能带来显著优势:提升逻辑复用性、封装实现细节、优化应用性能、简化数据查询。
关于这些模式的存在意义及 Redux 使用理念的更多详情,请参阅:
应用在完全应用这些模式后的效果如下:
- 动作创建器函数封装了动作对象和 thunk 的准备工作
- 动作创建器可接收参数、包含设置逻辑,并返回最终的动作对象或 thunk 函数
- 记忆化选择器能提升 Redux 应用性能
- Reselect 提供生成记忆化选择器的
createSelectorAPI - 输入相同时记忆化选择器返回相同结果引用
- Reselect 提供生成记忆化选择器的
- 请求状态应使用枚举而非布尔值存储
- 使用
'idle'、'loading'等枚举有助于保持状态一致性
- 使用
- "Flux 标准动作"是组织动作对象的通用规范
- 动作使用
payload承载数据,meta存储附加描述,error标记错误
- 动作使用
- 规范化状态便于通过 ID 查找条目
- 规范化数据存储在对象而非数组中,以条目 ID 作为键名
- Thunk 可从
dispatch返回 promise- 组件可等待异步 thunk 完成后执行后续操作
下一步是什么?
手动编写全部代码耗时且复杂。因此我们推荐使用官方 Redux Toolkit 包来编写 Redux 逻辑。
Redux Toolkit 包含的 API 能帮助您用更少的代码编写所有典型的 Redux 使用模式。它还有助于防止常见错误,例如意外地改变状态。
在第 8 部分:现代 Redux中,我们将介绍如何使用 Redux Toolkit 来简化目前编写的所有代码。